- Published
Implementing Google OAuth Login (Vue / Express)
目錄
Note: This post is translated by AI. If you find any unnatural phrasing or errors, please feel free to contact me via email or other channels. Your feedback is appreciated!
Preface
Recently, the company needed to integrate third-party login. As it was my first time doing it, I stepped into quite a few pitfalls. I also found that Google has updated again, and many articles I found were no longer usable, so I decided to share and record the integration process.
Basically, if you are integrating using the Google Sign-in JavaScript library, Google has deprecated it (deprecated) and will completely discontinue it on 2023/03/31, meaning it will no longer be available for download or use. So those who implemented it following this process before should hurry up and refactor!
This article will use Vue3 and Express to take everyone step by step to implement a simple Google third-party login!
(In addition to using the new Sign In With Google button, there will also be the new Google One Tap feature)
Because I only use Google's native Library and not one wrapped by others, if you are using React, you can also use it with slightly modified syntax!
Now Google Login is getting easier to integrate. It is recommended not to use libraries wrapped by others to reduce coupling, because my company recently had to re-implement it because the library used before was no longer maintained.
Overview
The integration process will be divided into four steps:
- Set up OAuth Consent Screen and Credentials in Google Cloud.
- Frontend: Initialize & Display Google Button.
- Frontend: After the user clicks agree, POST Google Credential to the backend, and get the returned Authorization Token to successfully login and retrieve User Data!
- Backend: After receiving Google Credential in the POST Route, confirm with Google Auth Library, get Google User Data, save these User Data to DB or return corresponding Authorization Token and User Data to the frontend.
I believe there will still be some doubts after reading these steps. Let's implement it step by step below!
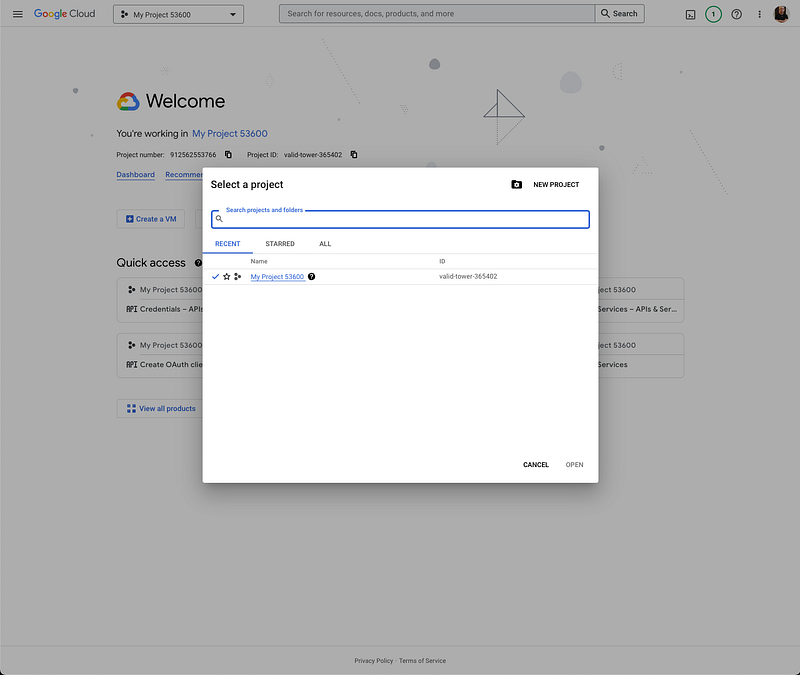
1. Google Cloud Settings
- Select or create a project you want to use Google Login for in Google Cloud (img)
- Then go to the OAuth Consent Screen place.
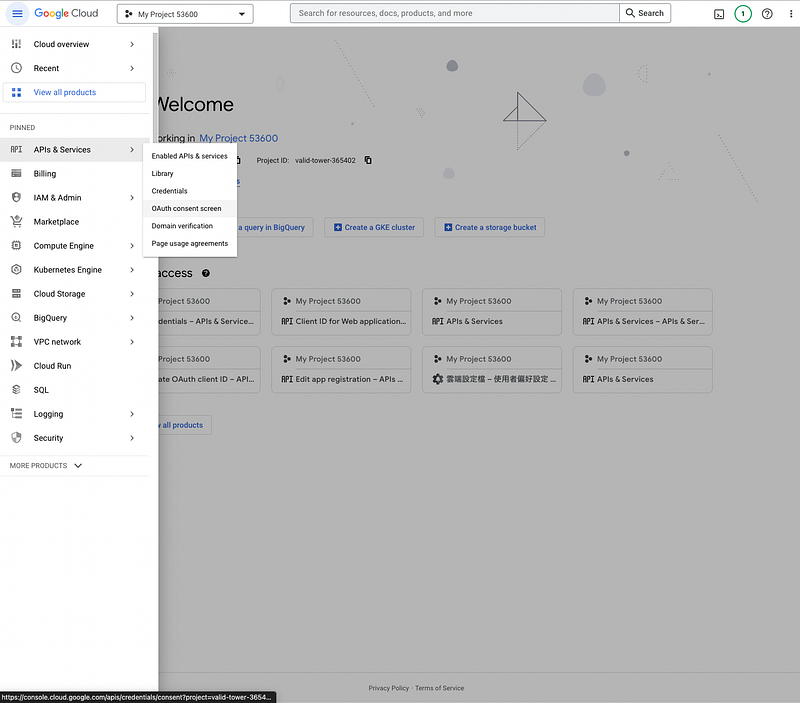
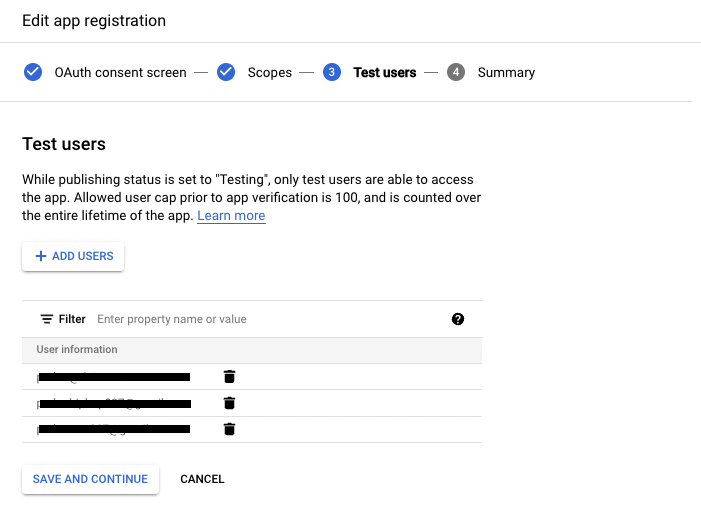
- Register an App and just fill in the fields according to the steps!
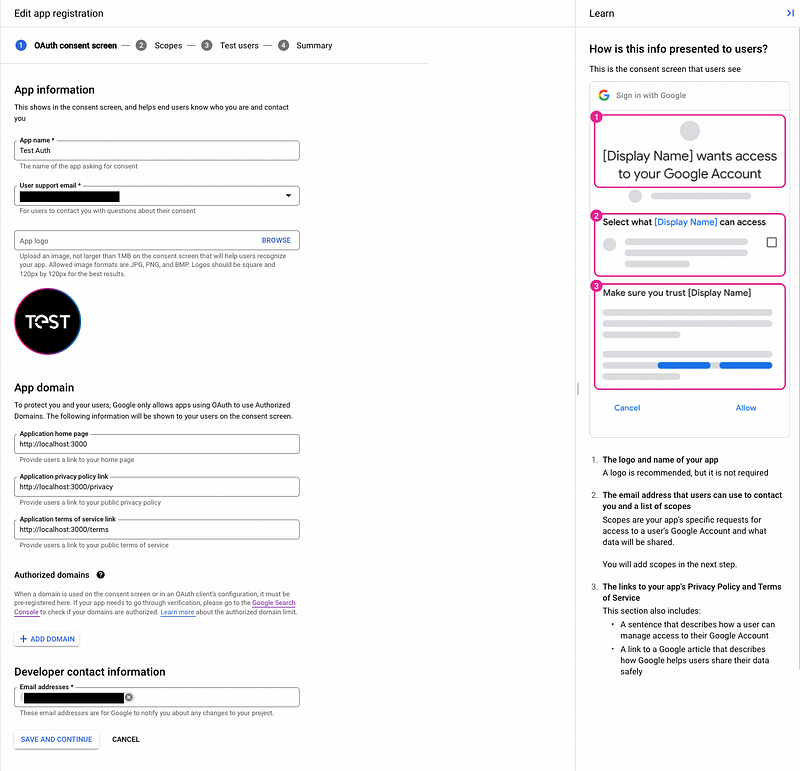
Scopes are which data of the authorized user you allow the App to access. Basic ones are like auth/userInfo.email and auth/userInfo.profile in the image (img)

Test Users are the accounts you allow to log in during testing.
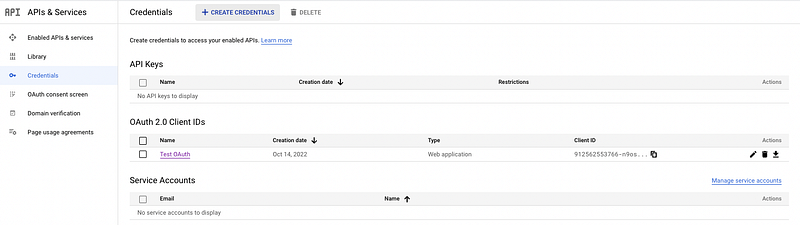
- After creating the APP for OAuth Consent Screen, set up Credentials.
Click Credentials on the left, then click CREATE CREDENTIALS above.
- Set Authorized JavaScript origins and Authorized redirect URIs.
Authorized JavaScript origins: Refer to the frontend domain. Authorized redirect URIs: Refer to which URI the backend will receive the POST Request with Google Credential after the user clicks agree.
For the Demo later, the frontend will be at http://localhost:5173, and the backend will use http://localhost:3000/verify-token to receive the POST Request. Note that for the domain here, you need to add http://localhost specifically during local testing, and Google does not allow IP as source, so something like 127.0.0.1 won't work.
(And after officially going live, remember to change to the official domain and URI)

- After creation, you can see your Client ID on the list, which will be used later!
(Client means we are the Client to Google, and Google is the Server from whom we get credentials and user data)

Congratulations, we have successfully completed the Google Cloud settings.
After obtaining the Client ID and authorizing our frontend Origin and backend URI, let's implement the frontend and backend respectively!
2. Frontend: Initialize & Display Google Button / On Tap Login
Basically follow this process: Display the Sign in with Google Button, but I'll walk through it below for everyone!
Load google library script in entry index.html
// index.html

<body>
  <script src=”https://accounts.google.com/gsi/client" async defer></script>
  <div id="app" />
</body>
At this time, window will be registered with a google object, and subsequent operations will use this object!
Let's directly log window.google in the browser to see what's inside.

Initialize settings by calling
window.google.accounts.id.initializedirectly.- Client ID: Just copy from Credentials.
- callback: The Callback Function triggered when the user clicks agree on the Google login Popup.
- Cancel On Tap Outside: Whether clicking outside the Tap area can close the Tap Login Model.
- Context:
signin | signout | login
Render Button uses
window.google.accounts.id.renderButton.Display On Tap Login relies on calling
window.google.accounts.id.prompt().
onMounted(() => {
  window.onload = () => {
    if (CLIENT_ID) {
      window.google.accounts.id.initialize({
        client_id: CLIENT_ID, // required
        callback: onLogin, // invoke while user login in the popup
        cancel_on_tap_outside: true, // optional
        context: 'signin', // optional
      });

      window.google.accounts.id.renderButton(
        document.getElementById('googleButton'),
        { theme: 'outline', size: 'large' } // customization attributes
      );

      window.google.accounts.id.prompt(); // show one-tap popup
    } else {
      console.error("client_id doesn't exist!");
    }
  };
});
3. Frontend: Get Token and Login after User Agrees
This step is implementing the callback passed in during initialize above.
And this is also the function executed after the user logs in on the Google login screen.
So we will implement our own login logic here, like this:
const onLogin = (res) => {
  const axiosOptions = {
    headers: { 'Access-Control-Allow-Origin': CLIENT_URL },
  };
  axios
    .post(`${API_URL}/verify-token`, res, axiosOptions)
    .then((res) => {
      console.log('res', res);
      userData.value = res.data;
    })
    .catch((error) => {
      console.log('error', error);
    });
};
The callback will receive a response from Google (res of onLogin), and the response will contain this data. We will take the credential from it to send to the backend for verification.
{
  "clientId": "123456789.apps.googleusercontent.com",
  "credential": "",
  "select_by": "btn" // or 'user'
}
Frontend processing ends here!
Brief review: We introduced gsi client, established google object under window, then used initialize and renderButton provided by google object to initialize and render Google Button. Our own login logic onLogin function is passed into callback during initialize for execution after user login.
4. Backend: Receive, Verify, Return User Data ( and Authorization Token )
We saw above that onLogin POSTs to /verify-token. Next, we will verify and get Google User Data in this Route.
Basically just follow Google's Example, and remember to handle CORS!
From here, the third-party integration is complete!
Next, the backend just needs to let the frontend know that login is successful.
And here we simply return User Data to the frontend.
In company projects, we adopt the same approach as general registration or login to save data to DB or obtain Authorization Token and User Data for the frontend.
const cors = require('cors');
app.use(cors());
const CLIENT_ID = 'YOUR CLIENT ID';
/** Handle the POST request from onLogin callback in frontend */
app.post('/verify-token', (req, res) => {
  // use google-auth-library to verify token
  const { OAuth2Client } = require('google-auth-library');
  const client = new OAuth2Client(CLIENT_ID);
  async function verify() {
    // get credential from google
    const token = req.body.credential;
    console.log('token from credential', token);
    const ticket = await client.verifyIdToken({
      idToken: token,
      audience: CLIENT_ID,
    });
    const payload = ticket.getPayload();
    // You can store user data in DB and return Authorization Token here.
    res.json({
      email: payload.email,
      email_verified: payload.email_verified,
      picture: payload.picture,
      name: payload.name,
    });
  }
  verify().catch(console.error);
});
Demo
After running the Repo provided below, it will look like this:
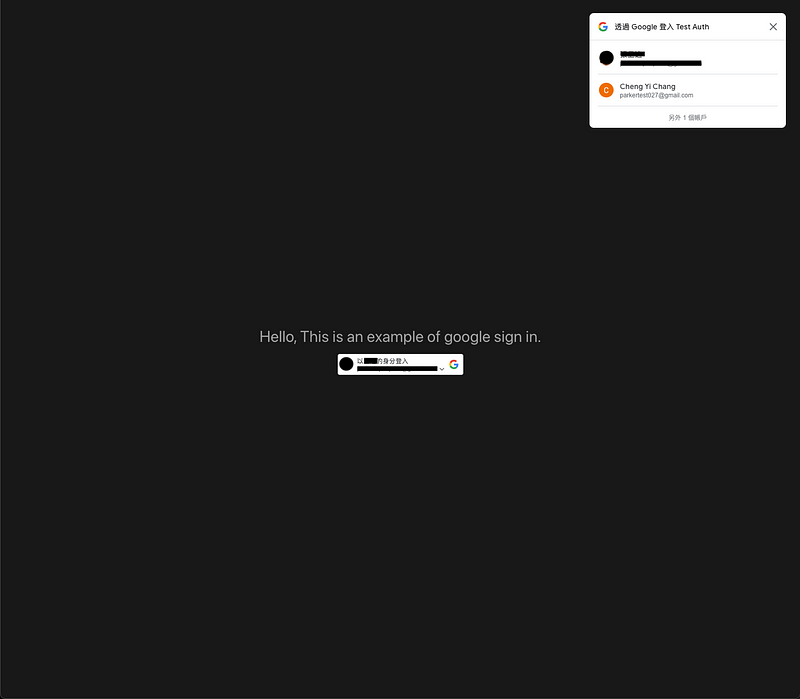
Initial login screen
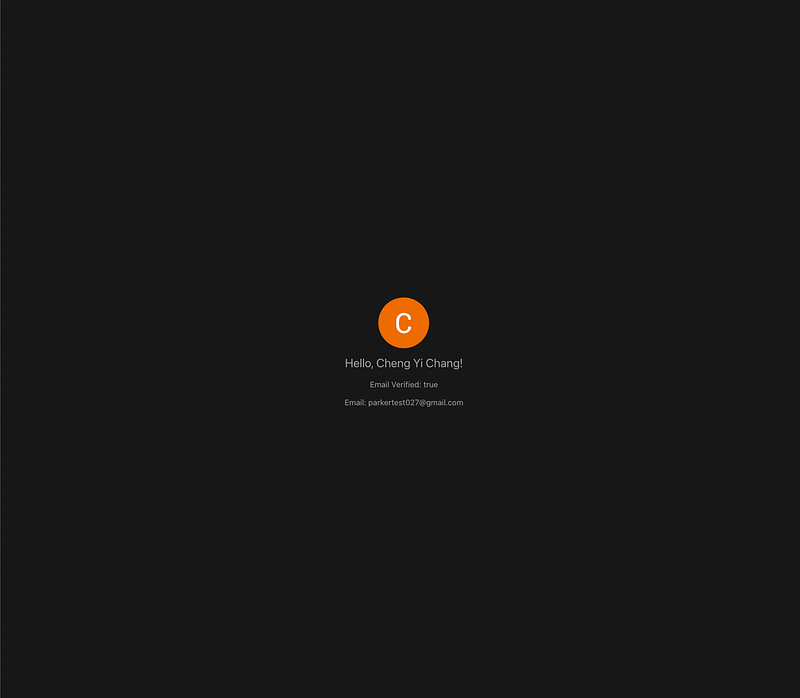
After user login
Frontend: Vue Sign In With Google
- After cloning,
npm install+npm run devwill run at port:5173, which is exactly the Authorized JavaScript origins we set in Google Cloud — Credentials. - When developing yourself, remember to change to your own Port, and change to the official domain after going live!
Backend: Express Sign In With Google
- After cloning,
npm install+npm run startwill run at port:3000, which is exactly the Authorized redirect URIs we set in Google Cloud — Credentials.
Conclusion
I read a bunch of documents for third-party integration and did it confusedly. Just a few days after finishing writing, I still forgot some details when writing the article, but organizing it into an article makes it much clearer!
Hope this article is helpful to everyone who needs to integrate Google Login!
I'm going to continue integrating Facebook Login. I have to say, compared to Facebook and Twitter integration, implementing Google is much, much friendlier.